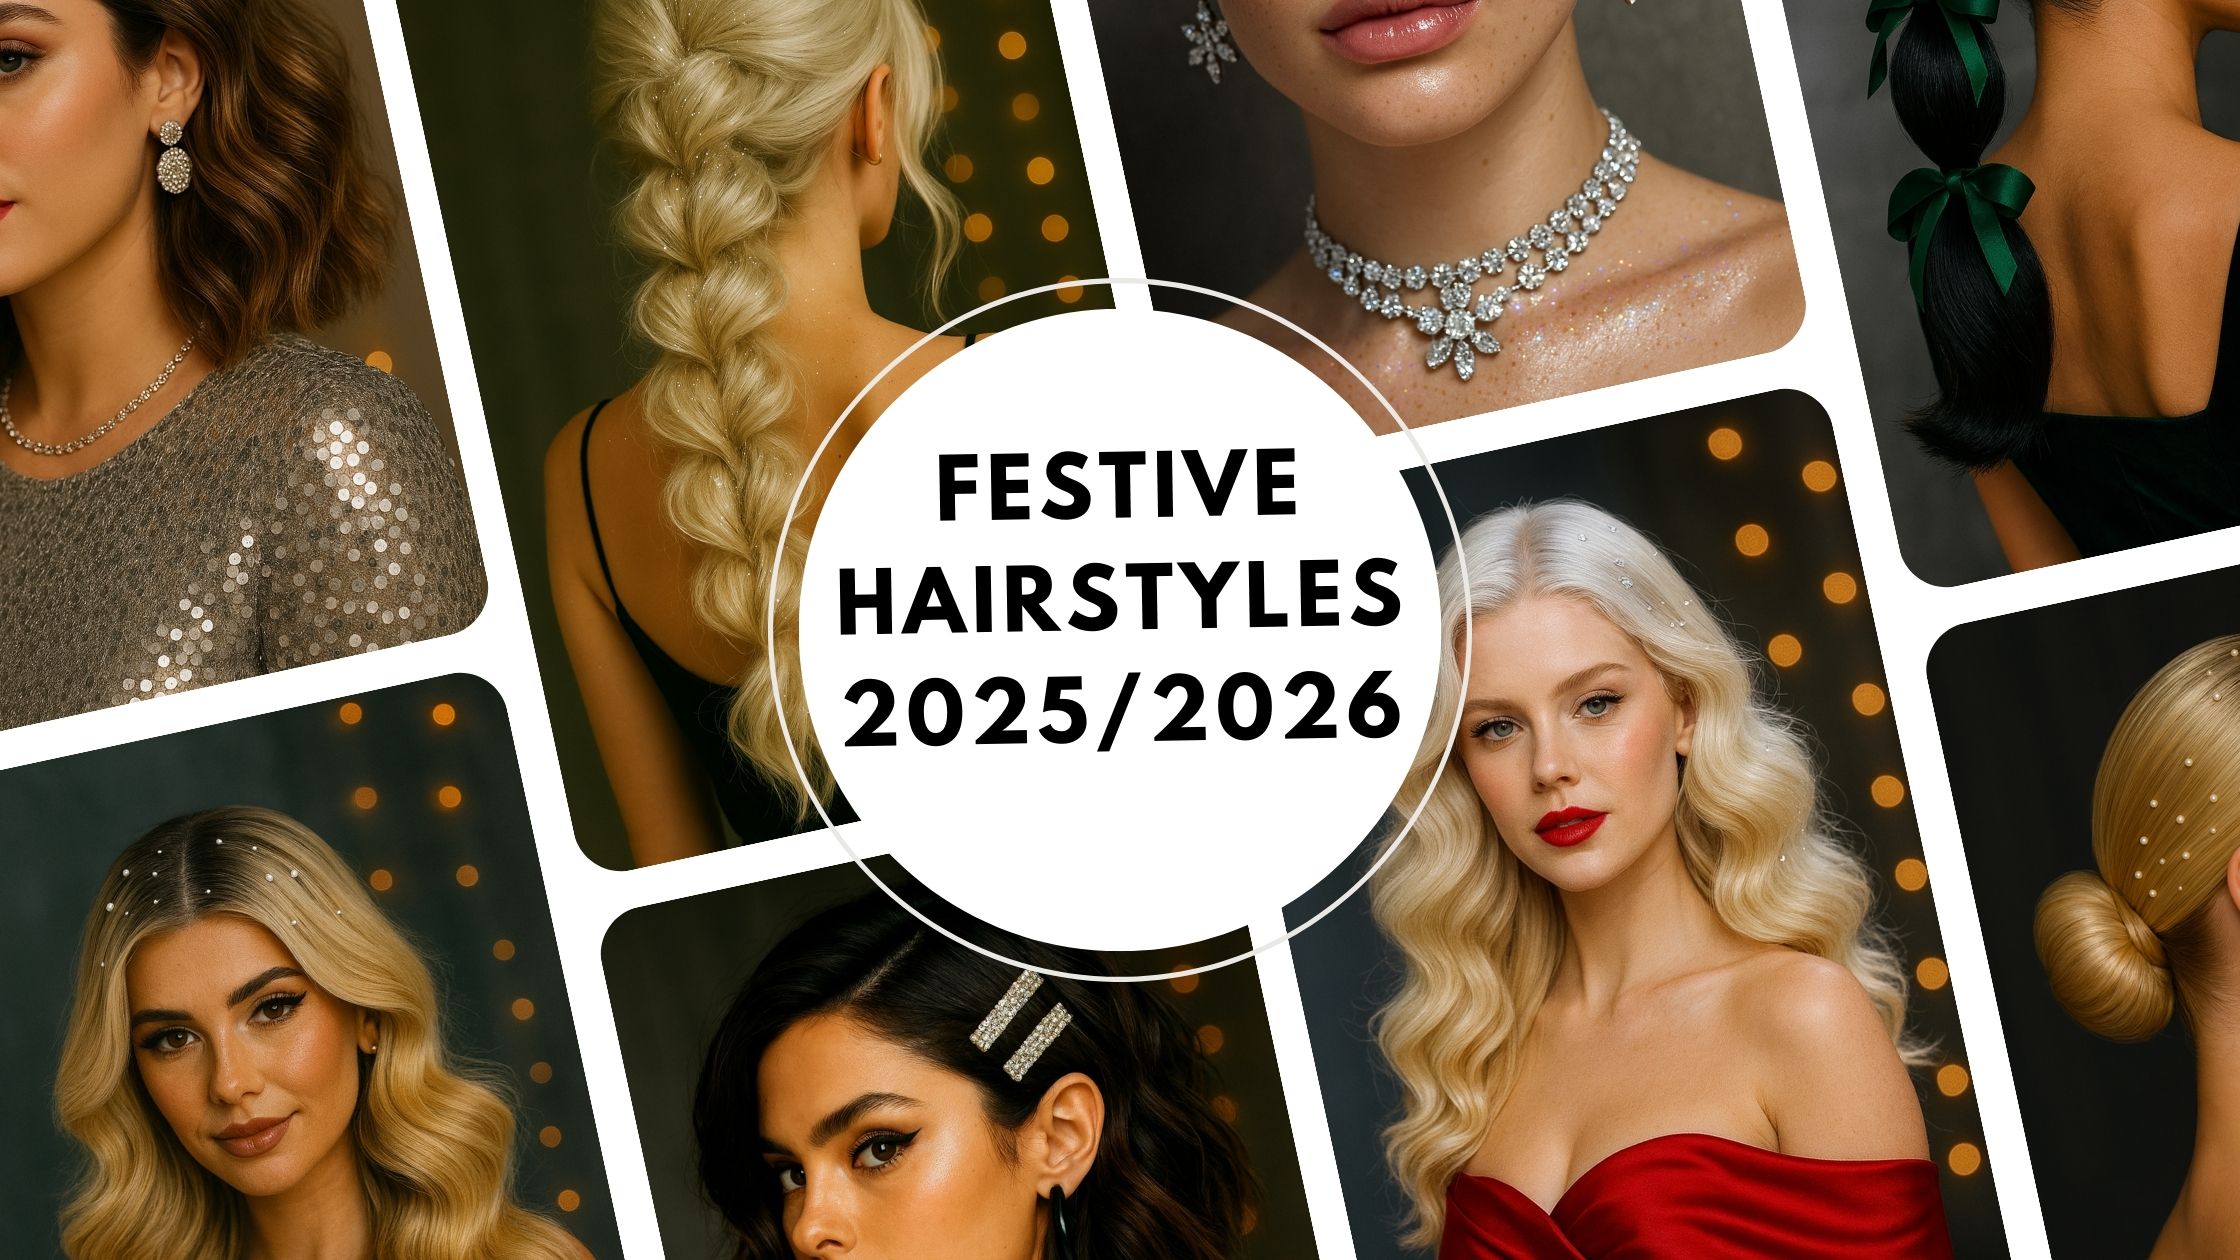
Classic Hollywood Waves with Subtle Rhinestone Accents
Still the No.1 holiday glam hairstyle. Soft, glossy, timeless perfect for red lips, sequins, party looks.Soft, voluminous Hollywood waves styled with a clean center part and a glossy platinum blonde finish. The curls are full, bouncy, and sculpted, giving that vintage red carpet glamour. A few delicate rhinestones are scattered throughout the hair for a soft, festive sparkle that feels elevated and timeless rather than over the top.


Product recommendations are clickable throughout this post.
1. Prep for Glossy, Sculpted Waves
Start with clean, fully dried hair. Apply a heat protectant and a lightweight shine serum through the mid lengths and ends. This creates the smooth, reflective base that Hollywood waves are known for.
2. Create the Clean Center Part
Use atail comb to carve a sharp center part or side part. Smooth both sides so the hair lies flat against the roots, this makes the pearlescent detailing stand out beautifully.
3. Form the Hollywood Waves
Using a1–1.25 inch curling iron, curl each section in the same direction. Pin each curl to cool for maximum longevity. Once fully cool, release and gently brush through with a soft bristle brush to sculpt the signature S-shaped wave pattern.
4. Set the Shape
Lightly mist aflexible hold hairspray while guiding the curves of each wave with your fingers or the comb. The goal is polished, soft, and uniform, never crunchy.
5. Add Pearl Hair Accents
Placesmall pearl pins along the part line, keeping the spacing soft and intentional. Scatter them irregularly so they feel delicate and celestial rather than overly structured. This is the detail that transforms classic waves into a holiday showstopper.
6. Final Shine Finish
Smooth any flyaways with a touch of hair wax. Ensure the waves keep their sculpted definition while maintaining movement.
Low Sleek Bun With a Holiday Twist
Clean girl elevated. Works with gowns, minimal glam, NYE looks. The perfect holiday hairstyle for Holiday Parties and New Year’s Eve glam. Smooth, glossy hair is pulled into a neat low bun while tiny celestial pins add a festive shimmer without looking overdone. Clean girl elevated. Works with gowns, minimal glam and timeless.


Product recommendations are clickable throughout this post.
1. Prep for a High Gloss Base
Begin with clean, blow dried hair. Work a smoothing serum or lightweight hair oil through the mid lengths and ends to create that reflective, “liquid hair” sheen. This step lays the foundation for the bun’s sleek, mirror like finish.
2. Build the Sleek Structure
Using a fine tooth comb, create a sharp center or side part. Brush both sides flat against the head, keeping the crown smooth and controlled. Gather the hair into a low ponytail at the nape and secure it tightly.
3. Shape the Polished Bun
Twist the ponytail and wrap it into a neat, compact bun. Pin it securely, ensuring no loose ends peek out. For extra refinement, mist a light layer of hairspray and glide the comb over the surface to eliminate any flyaways or a hair wax.
4. Add the Celestial Details
Arrange small pearls or crystal pins along the top and sides of the head. Keep the placement soft, scattered, and airy like a subtle constellation. This turns a timeless bun into a festive, statement making style.
5. Finish with a Soft Holiday Glow
Seal the look with a shine spray to enhance the glossy texture. For a fully elevated moment, style this bun with velvet, satin, or deep jewel toned outfits. Or use a hair wax to smooth out any flyaways.
Festive Bubble Ponytail with Red Ribbons
A sleek, high ponytail shaped into soft, structured bubbles, each tied with bright red satin ribbons. The hair is smoothed to a glossy finish and styled in a platinum blonde shade that reflects beautifully against holiday lighting. This look is playful, polished, and instantly festive. ( Products are clickable )


Product recommendations are clickable throughout this post.
1. Prep for Sleek, Silky Hair
Start with clean hair. Apply a smoothing serum or lightweight cream through the mid lengths and ends to create that glossy, ribbon like shine. This base is what makes each bubble look smooth and defined.
2. Create the Perfect High Ponytail
Using a fine tooth comb, brush all the hair upward into a high ponytail. Keep the base tight, smooth, and polished, making sure the crown lays flat. Secure firmly with a strong elastic so the style holds all night.
3. Add the Ribbon Accents
Tie small red satin ribbons , or Red Bows, Green Bows etc at even intervals down the ponytail. Or you can buy premade ribbons here. Keep each placement symmetrical and neatly tied, the contrast between sleek hair and bold ribbon creates the signature festive look.
4. Shape the Bubble Sections
Gently pull apart each section between the ribbons to form rounded, voluminous “bubbles.” Work slowly so each bubble stays even, smooth, and perfectly puffed without losing its shape. You can also use textured powder if you want that extra poof.
5. Final Touch: Gloss & Hold
Finish with shine spray for a reflective, holiday ready sheen. Mist a flexible hold hairspray over the entire ponytail to keep the bubbles lifted and polished while still looking soft and touchable.
Pull Through Braids
A voluminous pull through braid on the top half of the hair that blends seamlessly into a soft, low ponytail. The braid is loose and airy with pulled-out sections for fullness, while the lower half of the hair falls into gentle waves that keep the style romantic and effortless. It’s the perfect mix of structured and soft wearable, feminine, and ideal for holiday gatherings.


1. Prep for Soft, Textured Volume
Start with dry, brushed hair, straight or pre curled. Apply a textured hairspray ,lightweight. This balance gives the braid fullness without frizz while keeping the waves silky and defined.
2. Create the Pull Through Braid Foundation
Section off the top half of the hair from temple to temple. Begin a loose pull through braid, securing each section with small elastics. Gently pull apart each loop to create that airy, romantic volume. This “pancaking” is what gives the braid its soft, dimensional shape. Video Reference
3. Secure and Blend into a Low Ponytail
Once the braid reaches the midpoint of the head, secure it with an elastic. Gather all remaining hair, including the braided section into a low ponytail. Keep the base smooth while allowing the braid to maintain its texture.
4. Add Soft, Flowing Waves
Curl the ends of the ponytail with a medium barrel iron, alternating directions for natural movement. Brush through lightly to soften the curls into relaxed waves that balance the structure of the braid.
5. Final Touch: Texture, Shine & Hold
Finish with a texture spray throughout the braid and ponytail to enhance movement without weighing the style down. Add a light mist of shine spray for a glossy, holiday ready sheen, and set with a flexible hold hairspray to keep everything polished yet soft. Or you can add some hair glitter or jewels.
Soft Textured Waves with Sparkling Sequin Clips
A shoulder length bob styled in soft, textured waves with warm brunette tones and subtle highlights. Two thin sequin clips add a modern festive shimmer, balancing the effortless texture with just the right amount of holiday sparkle. Paired with a bold red lip, the look feels polished, feminine, and perfect for seasonal events.


Product recommendations are clickable throughout this post.
1. Create the Soft, Polished Texture
Blow dry the hair using a round brush to build smooth volume at the roots and gentle bend through the ends. Add a lightweight smoothing cream to keep the finish glossy without weighing the hair down.
2. Build the Deep Side Part
Using the end of a tail comb, carve a clean side part. Smooth the front section so it lies sleek against the head, this contrast is what makes the clips pop.
3. Define the Waves
Use a medium curling iron or wand to add loose, polished waves throughout the bob. Curl away from the face and brush through softly for that effortless, sculpted shape.
4. Place the Rhinestone Clips
Slide two or three sparkling hair clips on the parted side. Keep them parallel and close together for a modern, symmetrical vibe. Make sure they sit flush so the look stays clean and elevated.
5. Finish with Shine & Hold
Mist the hair lightly with shine spray for a luminous finish. Set the front section with a flexible hold hairspray to keep everything smooth while maintaining natural movement.
Hair Extensions
If you want to add some fullness or length, Hair Extensions is the way to go .
Here are some of our favorite places to shop: